A step-by-step guide to adding a profile picture to Slack.
We often use Slack for our trainings and courses and one of our hard and fast rules is that you have to upload a profile photo of your face. Especially online, being able to see your face (i.e., having a profile picture) goes a long way to increasing community chatter and makes communicating online easier as you can associate who is talking with a recognizable face.
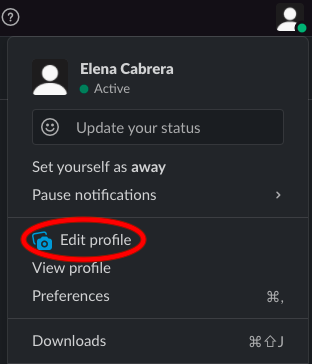
Step One: Navigate to the Profile icon in the top right of your window and click on it.

Step Two: Click on the option that reads "edit profile."

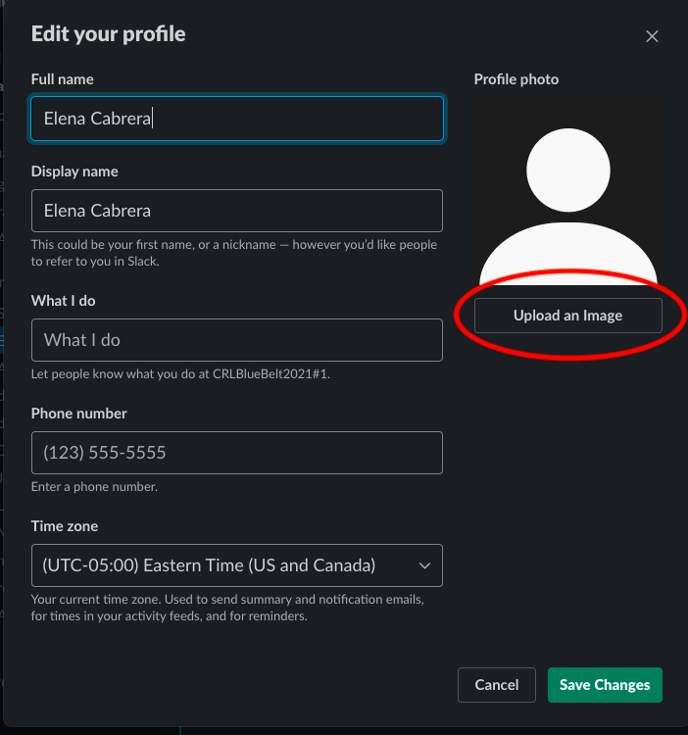
Step Three: Click the button that reads "Upload Image" and choose the image you want as your profile picture from your computer.

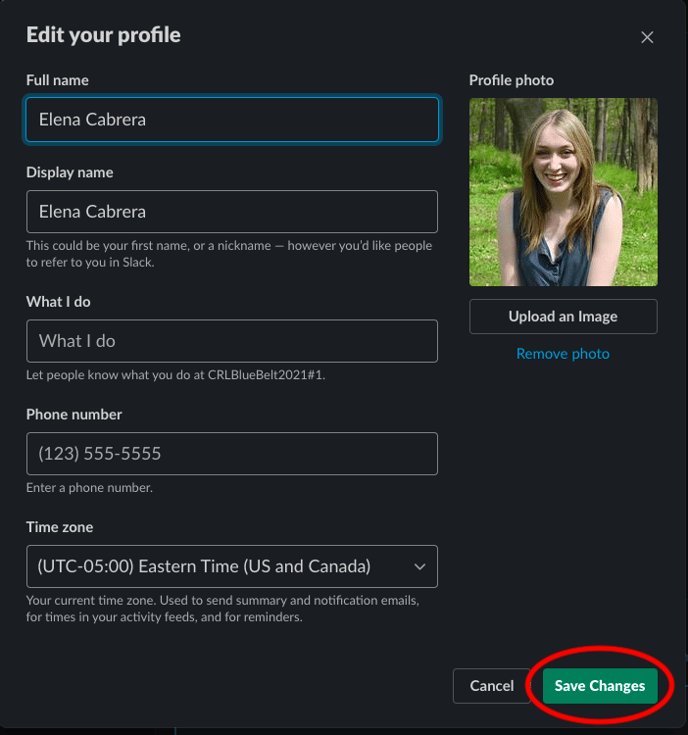
Step Four: Make sure to hit "Save Image" after making sure the profile picture looks the way you want it to.

Step Five: Finally, hit "Save Changes." This will save your profile picture and any other changes you have made to your profile.

Congrats! Now you have a brand new profile picture in Slack.
What makes a good profile picture?
Here are a few examples of good and not so good profile pictures...
Good: A clear shot of your face.

Remember, your profile photo is going to be relatively tiny like this:

Look at how tiny my face is because it's a picture of me and my big-faced dog bear! You can barely see my face...
Not-so-good: An image from very far away (even if you are doing something cool like jet-skiing). And, even if your face is visible but far away.


